25 July 2015

Make your own Android Notification

What we will do?
-> We will make an app with a button. When the button is pressed we will get a notification.

What we will need?
  • activity_main.xml
  • MainActivity.java
Step 1 : Create a new android application. Click on File->New->Android Application Project.
file new android app

Step 2 : Give the name as NotificationDemo and package name as com.mia.notificationdemo. Click Next continuously.
NotificationDemo mia
Click Finish.
click finish

Step 2 : Add a button in activity_main.xml and change its name to any name(Notification).
drag button
activity_main.xml
<RelativeLayout xmlns:android="http://schemas.android.com/apk/res/android"
   android:layout_width="match_parent"
   android:layout_height="match_parent">

   <Button
      android:layout_width="wrap_content"
      android:layout_height="wrap_content"
      android:text="Notification"
      android:id="@+id/button"
      android:layout_marginTop="77dp"
      android:layout_below="@+id/editText3"
      android:layout_alignRight="@+id/textView"
      android:layout_alignEnd="@+id/textView" />

</RelativeLayout>

Step 3 : The code for MainActivity.java is shown below.

MainActivity.java
package com.mia.notificationdemo;


import android.app.Activity;
import android.app.Notification;
import android.app.NotificationManager;
import android.app.PendingIntent;
import android.content.Context;
import android.content.Intent;
import android.os.Bundle;
import android.view.View;
import android.widget.Button;

public class MainActivity extends Activity {

@Override
protected void onCreate(Bundle savedInstanceState) {
super.onCreate(savedInstanceState);
setContentView(R.layout.activity_main);

Button b1=(Button)findViewById(R.id.button);
   
     b1.setOnClickListener(new View.OnClickListener() {
        @Override
        public void onClick(View v) {
         
           NotificationManager notif=(NotificationManager)getSystemService(Context.NOTIFICATION_SERVICE);
           Notification notify=new Notification(R.drawable.ic_launcher,"Title",System.currentTimeMillis());
           PendingIntent pending= PendingIntent.getActivity(getApplicationContext(), 0, new Intent(), 0);
           notify.setLatestEventInfo(getApplicationContext(),"Subject","Body",pending);
           notif.notify(0, notify);
        }
     });
}
}

Step 4 : Run the application.
notification output 1
notofication output 2

Explanation of the code :

Explanation from MainActivity.java :
NotificationManager notif=(NotificationManager)getSystemService(Context.NOTIFICATION_SERVICE);
  • Then we define the Notification object notify with icon,title and time of the notification. The title is not actually displayed in the notification. It is just used as a unique name to the notification.
Notification notify=new Notification(R.drawable.ic_launcher,"Title",System.currentTimeMillis());
  • Then we use object of type PendingIntent named pending. PendingIntent is used when we launch another Intent(of the notification) after an action in our main Intent(Intent of MainActivity class).
PendingIntent pending= PendingIntent.getActivity(getApplicationContext(), 0, new Intent(), 0);
  • The method getActivity() here creates a new Intent(for notification).
  • After that we use setLatestEventInfo() method to set the information in the latest notification. Here, in this example, the time is only changed and other parameters like head, body remains same.
notify.setLatestEventInfo(getApplicationContext(),"Subject","Body",pending);
  • At last we display the notification by calling the notify() method.
notif.notify(0, notify);

Github download
Stay Tuned with Made In Android

Published By:
Yatin Kode
on 25.7.15

17 July 2015

Make a Gesture based android application

What we will do?
-> We will make an application which will close the app as we draw a big 'C' on the screen.

What we will need?
  • Emulator of android v1.3 or above with sdcard
  • gesture app in the emulator(present by default)
  • MainActivity.java (java class)
  • activity_main.xml (xml layout)
Step 1 : Create a new android application. Click on File ->New->Android Application Project.
file new android application

Step 2 : Give a name to your application as GestureDemo and package name as com.mia.gesturedemo. Then click Next continuously.
GestureDemo mia
Click Finish
finish

Step 3 : Code for activity_main.xml is given below.

 activity_main.xml
<?xml version="1.0" encoding="utf-8"?>
<android.gesture.GestureOverlayView xmlns:android="http://schemas.android.com/apk/res/android"
android:id="@+id/gestures"
android:layout_width="fill_parent"
android:layout_height="fill_parent"
android:eventsInterceptionEnabled="true"
android:gestureStrokeType="multiple"
android:orientation="vertical" >
<TextView
android:id="@+id/textView1"
android:layout_width="wrap_content"
android:layout_height="wrap_content"
android:text="Make a 'C' to close" />
</android.gesture.GestureOverlayView>

Step 4 : Make a new folder named raw in res folder. Right-click on res->New->Folder.
res new folder raw

Step 5 : Open Android Virtual device Manager. Make a new Emulator or edit the previous emulator include sd card and give a size to it(any size). Click on OK.Then click Start.
new emulator with sd card

Step 6 : After you have started the emulator, click on Gestures Builder App.
Gestures Builder

Step 7 : Click on Add Gesture. Give a name to the gesture (close) and draw the gesture roughly (C) below it as shown in the screenshot.
add gesture


Step 8 : Click Done and you will see the name with the gesture as shown below.You can add other types of gestures too. Do not close the emulator.
gesture added

Step 9 : From the eclipse on the top right corner you will see the DDMS option, click on it. If not found, click on Open Perspective button on the left of Java,

9.a) There you will find DDMS.
9.b) Click on the emulator on left hand side.
9.c) Then click on File Explorer Tab as shown below.
9.d) You will find the gestures file in storage->sdcard->LOST_DIR folder. Click on it.
9.e) Now click on disk like icon on the top besides System Information(circled in red).
DDMS File Explorer storage

Step 10 : Go to the path of raw folder of your project. Then click Save.
path of raw folder

Step 11 : Refresh your project and you will see gestures file in raw folder in the Project Explorer.
gestures in raw folder

Step 12 : Add the below code in MainActivity.java.

MainActivity.java
package com.mia.gesturedemo;

import java.util.ArrayList;
import android.app.Activity;
import android.gesture.Gesture;
import android.gesture.GestureLibraries;
import android.gesture.GestureLibrary;
import android.gesture.GestureOverlayView;
import android.gesture.GestureOverlayView.OnGesturePerformedListener;
import android.gesture.Prediction;
import android.os.Bundle;

public class MainActivity extends Activity implements OnGesturePerformedListener {
GestureLibrary mLibrary;
@Override
public void onCreate(Bundle savedInstanceState) {
  super.onCreate(savedInstanceState);
  setContentView(R.layout.activity_main);
  mLibrary = GestureLibraries.fromRawResource(this, R.raw.gestures);
  if (!mLibrary.load()) {
    finish();
   }
  GestureOverlayView gestures = (GestureOverlayView) findViewById(R.id.gestures);
  gestures.addOnGesturePerformedListener(this);
}

public void onGesturePerformed(GestureOverlayView overlay, Gesture gesture) {
  ArrayList<Prediction> predictions = mLibrary.recognize(gesture);
  if (predictions.size() > 0 && predictions.get(0).score > 1.0) {
    String result = predictions.get(0).name;
    if ("close".equalsIgnoreCase(result)) {
      finish();
    }
  }
}
}

Step 13 : Run your application.


Explanation of the code :

Explanation from MainActivity.java :
  • First we load the gestures made by the Gesture Builder application in mLibrary variable of type GestureLibrary. By putting an if condition we check if the gesture file exists or not. If it does not exist we will stop the application by using close() method.
mLibrary = GestureLibraries.fromRawResource(this, R.raw.gestures);
   if (!mLibrary.load()) {
     finish();
   }
  • Now we make gestures variable of type GestureOverlayView which is used to make the screen ready for gestures. We will call gestures by using addOnGesturePerformedListener() method.
GestureOverlayView gestures = (GestureOverlayView) findViewById(R.id.gestures);
gestures.addOnGesturePerformedListener(this);
  • Now the method onGesturePerformed() is used to perform operation on particular gesture. The ArrayList predictions hold the name of the gestures and gesture itself defined in gesture file.
public void onGesturePerformed(GestureOverlayView overlay, Gesture gesture) {
  ArrayList<Prediction> predictions = mLibrary.recognize(gesture);
  • Now we compare String "close" to name of element in predictions. If it is equal then we close the application using close().
if ("close".equalsIgnoreCase(result)) {
      finish();
   }
  • You can add other gestures by defining new gestures in Gesture Builder app and adding them in MainActivity class as else if condition below close option.
Github download
Stay tuned with Made In Android

Published By:
Yatin Kode
on 17.7.15

7 July 2015

Upload Android Source Code to Github (continued....)

Continued from previous post

Step 12 : The Red exclamation (!) will be removed. Right-click on Project choose Team->Commit.
team commit

Step 13 : Write initial commit as message. Select All and click Commit and Push.
select all, commit and push

Step 14 : Copy the url of Github repository created in Step 4 in the URL box. Enter UserName and Password of GitHub Account and click Next.
Copy the url of Github repository created in Step 4 in the URL box. Enter UserName and Password of GitHub Account and click Next.

Step 15 : Click on Add All Branches Spec and click Next.
Add all Branches Spec ,Next

Step 16 : Verify Repository Name and click Finish. Wait till uploading process takes place.
click Finish

Step 17 : Click OK.
OK

Step 18 : Refresh the webpage shown in Step 4. You will see your project as below.
refresh browser
Stay Tuned with Made In Android

Published By:
Yatin Kode
on 7.7.15

Upload Android Source Code to Github

You must have installed the eclipse github plugin as shown earlier. Now will learn to upload our source code on GitHub without Git

Step 1 : Login to your GitHub Account. If you do not have a Github Account just SignUp.
github login

Step 2 : Click on the "+" sign at the top right corner and choose New repository from the drop-down menu.
new repository

Step 3 : Choose name of your repository (same as application) and provide a short description. Click public from the radio-button.
public repository

Step 4 : You will get a url as shown in the below picture. Copy it to a safe location (this is the url on which your project will be present).
copy url to notepad

Step 5 : Open Eclipse. Right-click on your project which you want to upload, choose Team->Share Project.
Team Share Project

Step 6 : Click on Create,
click Create

Step 7 : Select the Parent Directory (directory where you want to store project locally- local git- any location can work). Then Give a Name to your Repository created on your computer in the above location. Click Finish.
local repository location

Step 8 : Then Click Finish as shown below.
click Finish

Step 9 : You will see a Red Exclamation mark (!) on your Project. Right-click on the Project click on Build Path-> Configure Build Path.

Step 10 : Click on Android Private Libraries under Libraries and remove it by click Remove on Right-side. Remember the libraries you have used in the project.
remove private libraries

Step 11 : Then Click on Add External JARs and Browse to the location of the libraries you have used from sdk folder.

Browse to sdk folder and found the libraries as below. Include only those libraries which you have removed.
Location of android v4 library - sdk\extras\android\support\v4

Location of google-play-services library - sdk\extras\google\google_play_services\libproject\google-play-services_lib\libs

add external libraries
Continued to Next Post
Stay Tuned with Made In Android
Published By:
Yatin Kode
on 7.7.15

29 June 2015

Add Github plugin in Eclipse ADT

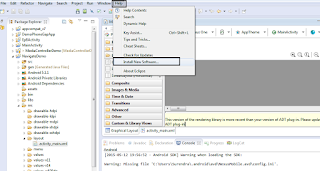
Step 1 : Start Eclipse and go to Help->Install New Software.
install new software

Step 2 : Copy the below link in the text-box
http://download.eclipse.org/egit/updates
Click on Add. Give Name as Github and click OK.
download github

Step 3 : Choose Eclipse Git Team Provider and tick Hide items that already existed and click Next.
eclipse team git provider

Step 4 : Click Next.
click next

Step 5 : Accept License Agreement and click Finish .
accept licence agreement

Step 6 : Restart Eclipse and you are done.
Stay Tuned with Made In Android

Published By:
Yatin Kode
on 29.6.15

Previous Page Next Page Home
Top