26 May 2015

Why Eclipse with ADT? Why Android Studio?

Why To ?
Why to use Eclipse with ADT ?
Ans : 
  1. Eclipse with ADT was made as the first tool to develop Android Applications.
  2. Easy GUI (Eclipse based).
  3. The coding resources available on the net are mostly based on Eclipse with ADT.
  4. Most of the bugs in Eclipse are cleared till now due to advancement and research.
  5. It allows for development of applications for Android Devices of v1 to the latest version available.
  6. ADT works with less RAM and works smoothly when the PC is previously loaded with other heavy softwares. (Again the upgrades matter)
  7. Easily Upgradable
Why to use Android Studio ?
Ans :
  1. Android Studio is the new framework for Android Development.
  2. It is easy to install.
  3. The size of Android Studio is less as compared to ADT.
  4. We can develop applications for Maps, Android Wear etc. directly without external library requirements.

Why Not To ?
Why not to use Eclipse with ADT ?
Ans :
  1. External libraries needed for Maps, Navigation Drawer etc.
  2. Large Size (Latest ADT with Eclipse available now is of 34GB).
Why not to use Android Studio ?
Ans :
  1. Start Time required is more comparatively.
  2. Pressurizes RAM. (Decreased performance in less RAM).
  3. Not enough resources available for learning till now.


Conclusion : 

  1. The type of applications to be developed decides which framework would be best used. 
  2. If the application is of higher functionality Android Studio can be used, otherwise Eclipse with ADT would be a better option.
  3. For First time development it is recommended to start with Eclipse ADT and later switch on to Android Studio.
Stay Tuned with Made In Android

Published By:
Unknown
on 26.5.15

20 May 2015

Update ADT to latest version

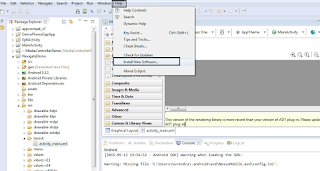
Step 1 : Open Eclipse with ADT. Click on Help->Install New Software.
install new software

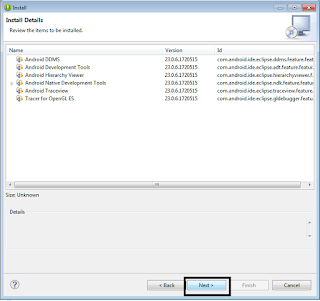
Step 2 : Copy the link below in Work with box. Click Add (Give Name as ADT Plugin) and check components shown in screenshot below. Then Click Next.
https://dl-ssl.google.com/android/eclipse/
tick all

Step 3 : Click Next.
next

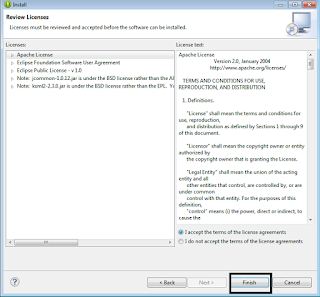
Step 4 : Click Finish.
finish

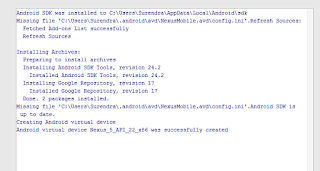
Step 5 : It will take time to update. For progress look at the bottom.Restart Eclipse and you are done.

Stay Tuned with Made In Android
Published By:
Unknown
on 20.5.15

17 May 2015

Create First Android App in Android Studio

You must have installed Android Studio by following the steps from the previous post. Now its time to create our First Application i.e. displaying "Hello World".

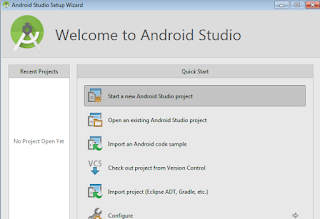
Step 1 : Open Android Studio. Select Theme.
open android studio

Step 2 : Click Next and the SDK Tools will be downloaded.
sdk download
Step 3 : Click Next. Select New Android Project.
create project

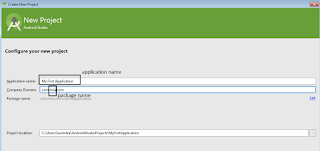
Step 4 : Give name and package name to your application. Click Next.
app name

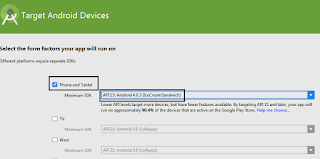
Step 5 : Select Phone and Tablet and choose minimum support version of android for your application.Click Next.
select phone

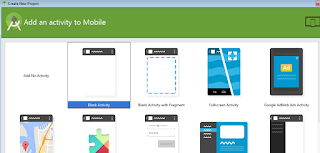
Step 6 : Select Blank Activity. Click Next
blankactivity

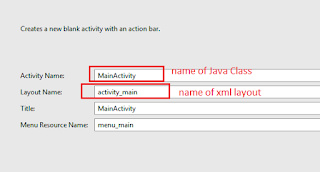
Step 7 : Select Name of your Activity and click Finish.
activity name

Step 8 : If the creating application window occurs again. hen Click Create New Android Application, it will directly create the same application , no need to worry.
gradle

Step 9 : The window is opened. Click on 1:Project on the left side toolbar. The app structure will be shown in Project Explorer.Now it is same as ADT with Eclipse.The activity_main will be opened followed by MainActivity.java
mainactivty java

Step 10 : Run the Project by clicking arrow above. Select the emulator device and Run It.
android device
At first App won't run since you did not install the drivers required to run the emulator.
To install the drivers click here.

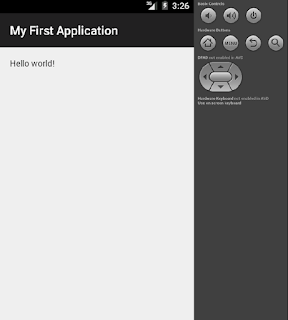
Step 11 : Emulator will be started and Hello World will be displayed.
emulator start

Stay Tuned with Made In Android

Published By:
Yatin Kode
on 17.5.15

14 May 2015

Emulator not started in Android Studio

As you installed the Android Studio and started making your first app, you may have realized that the emulator won't start. This is because of lack of some libraries or drivers.
The solution to this problem is.

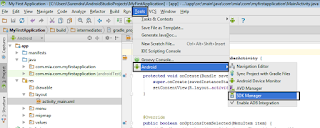
Step 1 : Open the Android SDK manager. Click on Tools->Android->SDK Manager from the menu bar.
android studio

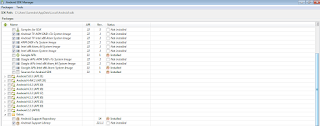
Step 2 : Select the packages as shown in the image below. All the packages are not shown in the image below.
packages downloaded
The packages to be chosen are:
  • Android TV ARM EABI v7a System Image (Important)
  • Android TV Intel x86 Atom System Image (Important)
  • ARM EABI v7a System Image (Important)
  • Intel x86 Atom_64 System Image (Important)
  • Intel x86 Atom System Image (Important)
  • Android Support Library (Important)
  • Intel x86 Emulator Accelerator HAXM (Important)
  • Google USB Driver Revision 11 (Optional)
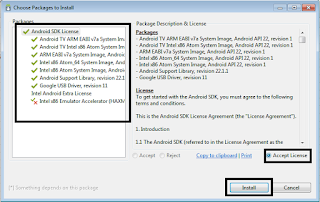
Step 3 : Click Install by accepting License after checking all packages on the left.
all packages

Step 4 : Run the project.

Choose the device and click Box besides Device. Do not click OK.
choose emulator

Step 5 : Choose Nexus5 API  OR Nexus One and click Edit (pencil shaped icon).
edit device

Step 6 : Give a name to your emulator. Go to Advanced Settings.
name emulator

Step 7 : Choose Appropriate RAM and Internal Memory,External Memory,and check on Keyboard Input. Then click Finish.
avd
 Now run the application with your newly defined emulator.

Stay Tuned with Made In Android

Published By:
Unknown
on 14.5.15

8 May 2015

Installing Android Studio on Windows

What is Android Studio ?
-> Android studio is a platform used to develop android applications. Previously, Eclipse with ADT was used to develop android apps, but google has now developed its own framework. Since there is a shift from Android v2 to Android v4 onwards, Android Studio is available to develop apps for Mobile phones having Android v4 onwards.

Steps to Install Android Studio on Windows OS :

Step 1 : Go to
 http://developer.android.com/sdk/index.html
and download Android Studio by clicking on Download Android Studio button.
download android studio
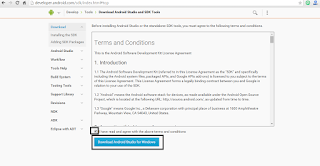
Step 2 : Accept the license agreement and click download
download link android studio
Step 3 : The .exe file will be downloaded. Click on it and setup will be started. Click on Next.
setup as

Step 4 : Check all the options as shown below and click Next.
setup 2

Step 5 : Click on I Agree
i agree

Step 6 : Choose location for Android Studio and Android SDK Installation
location sdk

Step 7 : Choose RAM allocation to start Android Studio. Use Recommended 512MB
memory need

Step 8 : Check if you want to create shortcut. Click on Install.
install 1

Step 9 : Click Finish.
finish setup

Stay Tuned with Made In Android

Published By:
Yatin Kode
on 8.5.15

Previous Page Next Page Home
Top